Pre-requesites
Terminal
You will need a terminal to run this to build the website and run the development server.
For Windows, Command Prompt or PowerShell are just fine.
I use Windows Terminal which you can find here
On MacOS and Linux you can use the default terminal
Code Editor
You will need a code editor for this workshop. I generally prefer Visual Studio Code but Sublime Text or Notepad++ work just fine.
React Developer Tools
You can use the Developer Tools Extension on your browser of choice to see which components are mounted, what their current state is, etc. It's a pretty nifty extension.
You can download it for Chrome here and for Firefox here
NodeJS
You will need to have NodeJS installed on your system as we need npm to install Gatsby CLI and the dependencies we need to build our website. Download and install the LTS version for your operating system from here.
Git
You will need to have Git installed for the commands mentioned below to work. Please install the right version for your system from here
Gatsby CLI
Once you have NodeJS installed and set up, open up your terminal. You can install gatsby-cli by running npm install -g gatsby-cli
Clone starter code
Once you have Gatsby CLI installed, you can set up the starter code for the workshop on your system by running gatsby new iris-spa https://github.com/karanrajpal14/iris-dsc-starter
1PS C:\Users\Karan> gatsby new iris-spa https://github.com/karanrajpal14/iris-dsc-starter2info Creating new site from git: https://github.com/karanrajpal14/iris-dsc-starter.git3Cloning into 'iris-spa'...4...5...6Your new Gatsby site has been successfully bootstrapped. Start developing it by running:78 cd iris-spa9 gatsby develop
Next, we need to start the development server and check if everything went well.
To do that, we need to change our directory to the one that we just created and run gatsby develop. Here's what that looks like:
1PS C:\Users\Karan> cd iris-spa23PS C:\Users\Karan\iris-spa> gatsby develop4success open and validate gatsby-configs - 0.041s5success load plugins - 0.656s6success onPreInit - 0.029s7success initialize cache - 0.008s8success copy gatsby files - 0.059s9success onPreBootstrap - 0.016s10success createSchemaCustomization - 0.005s11success Checking for changed pages - 0.002s12success source and transform nodes - 0.119s13success building schema - 0.277s14info Total nodes: 39, SitePage nodes: 1 (use --verbose for breakdown)15success createPages - 0.004s16success Checking for changed pages - 0.001s17success createPagesStatefully - 0.060s18success update schema - 0.017s19success write out redirect data - 0.002s20success Build manifest and related icons - 0.096s21success onPostBootstrap - 0.103s22info bootstrap finished - 3.620s23success onPreExtractQueries - 0.002s24success extract queries from components - 0.227s25success write out requires - 0.037s26success run static queries - 2.970s - 3/3 1.01/s27success run page queries - 0.043s - 4/4 92.83/s28success Generating image thumbnails - 6.625s - 30/30 4.53/s29⠀30You can now view gatsby-starter-default in the browser.31⠀32 http://localhost:8000/33⠀34View GraphiQL, an in-browser IDE, to explore your site's data and schema35⠀36 http://localhost:8000/___graphql37⠀38Note that the development build is not optimized.39To create a production build, use gatsby build40⠀41success Building development bundle - 4.861s
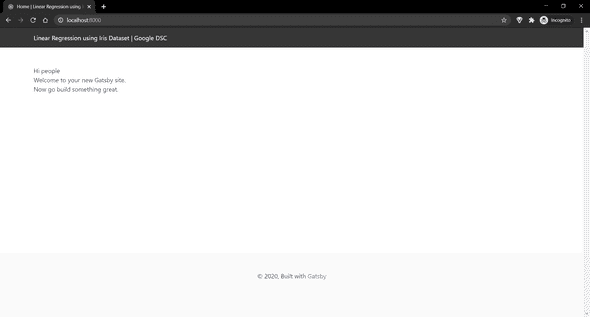
If you see that, great. We are all done. Open up the URL shown above i.e. http://localhost:8000/ in your browser and you should see the following page:
